
Hydroponics are a method of growing plants without soil. Instead, plants are grown in a nutrient-rich water solution. One of the main advantages is that plants grow faster and it makes it easier to control the nutrients that the plants receive. Having the perfect amount of nutrients, water and oxygen, allow the plants to grow faster and healthier.
In this article, we will go through an DIY hydroponic tower that you can build at home. Built with cheap materials and without previous experience in hydroponics.
Materials
- A PVC pipe, in this case a 1.5 m long, 150 mm diameter pipe. Cost: ~11 €.
- A 26 L black plastic container with lid. Cost: ~13 €.
- Plastic square exhaust for 150 mm diameter pipes. Cost: ~5 €.
- A plant pot dish with a diameter of 15 cm. Cost: ~1 €.
- A water pump with a max height of 2 m. In this example, Homvik 25 W. Cost: ~22 €.
- Hydroponic 5.5 net pots. Cost: ~16 € (for 60 pots).
- 2.5 m transparent flexible 12 mm pipe. Cost: ~4 €.
Total: ~68 €.
Additionally, bought seedlings of several plants to start. Cost: ~20 €. And used some fertilizers that I already had around.
Tools
- Drill.
- Circular saw.
- Heat gun.
- Screws and nuts.
- Water resistant tape.
Instructions
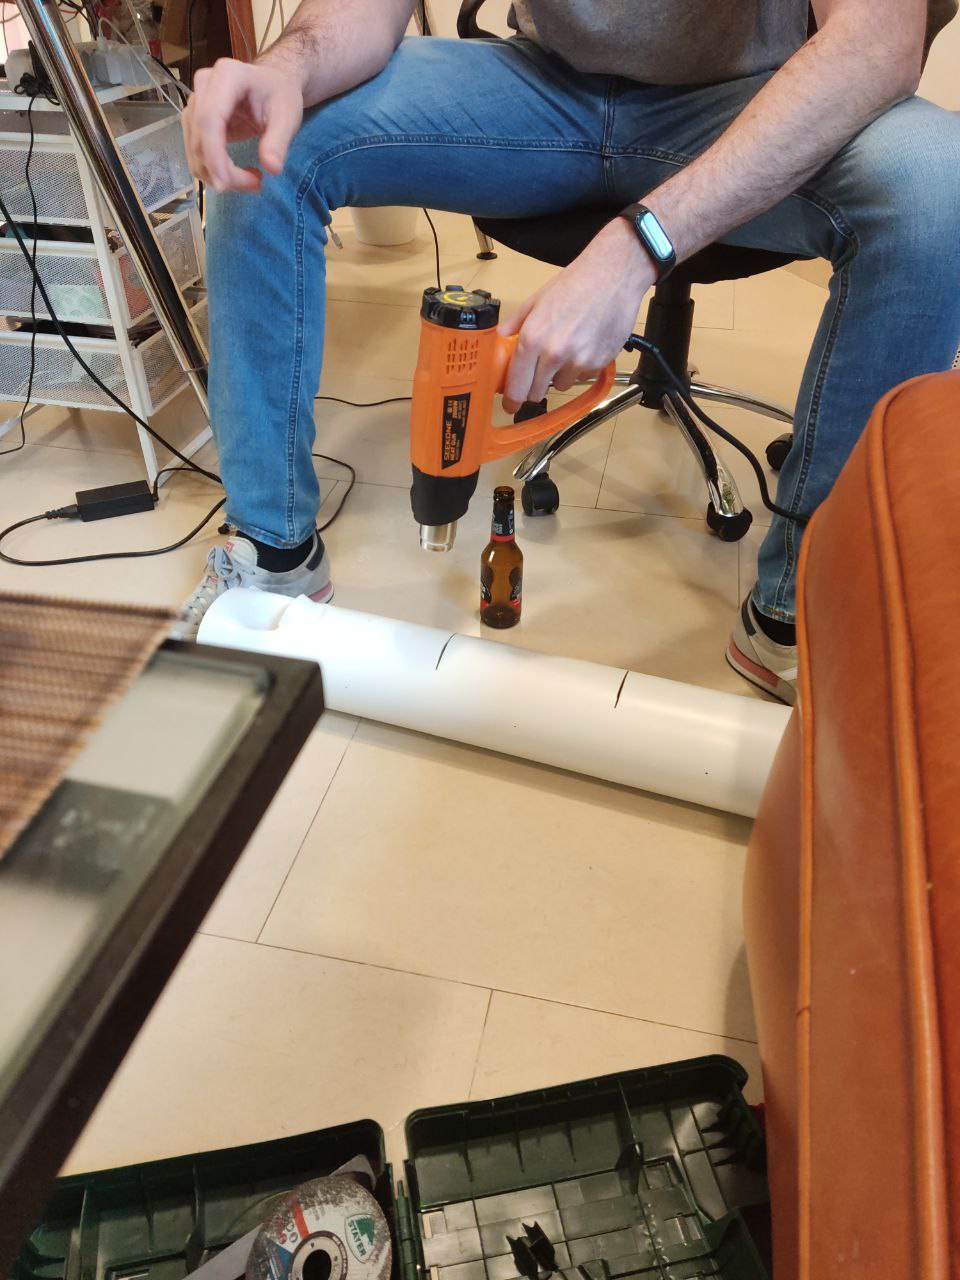
First, we will prepare the main component which is the PVC pipe. Make partial cuts every 20 cm perpendicular to the pipe, with two cuts per side and then the same by rotating 90 degrees and interlacing the cuts with the existing ones. Then, heat the pipe with the heat gun and insert a 25 cl beer bottle to create the pockets. It’s easier than it looks.
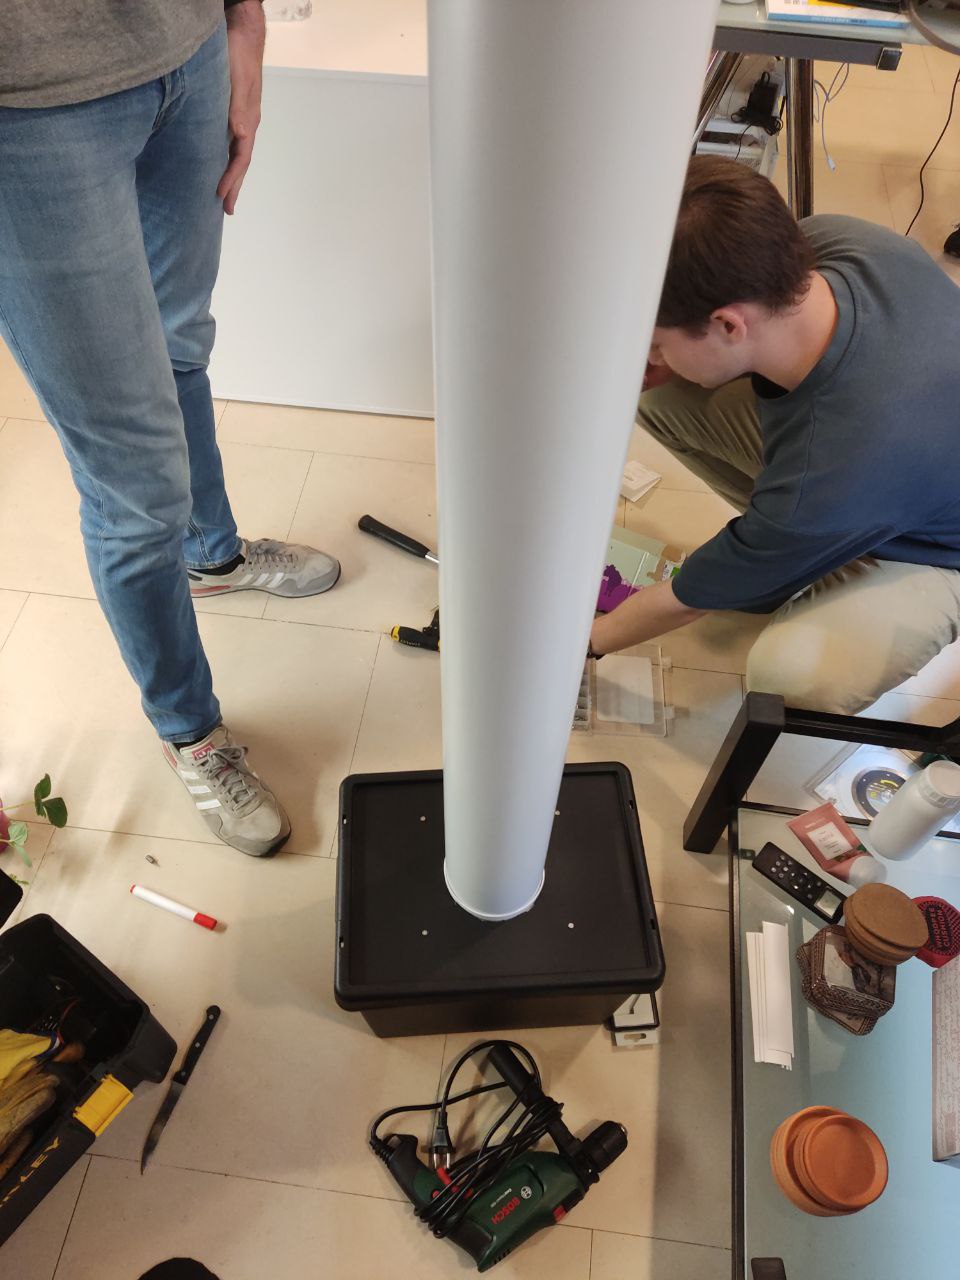
The idea of the square exhaust is to screw it to the container lid and then insert the PVC pipe through it, with additional screws to hold it in place. The water pump is placed at the bottom of the container, with the water output connected to the PVC pipe.
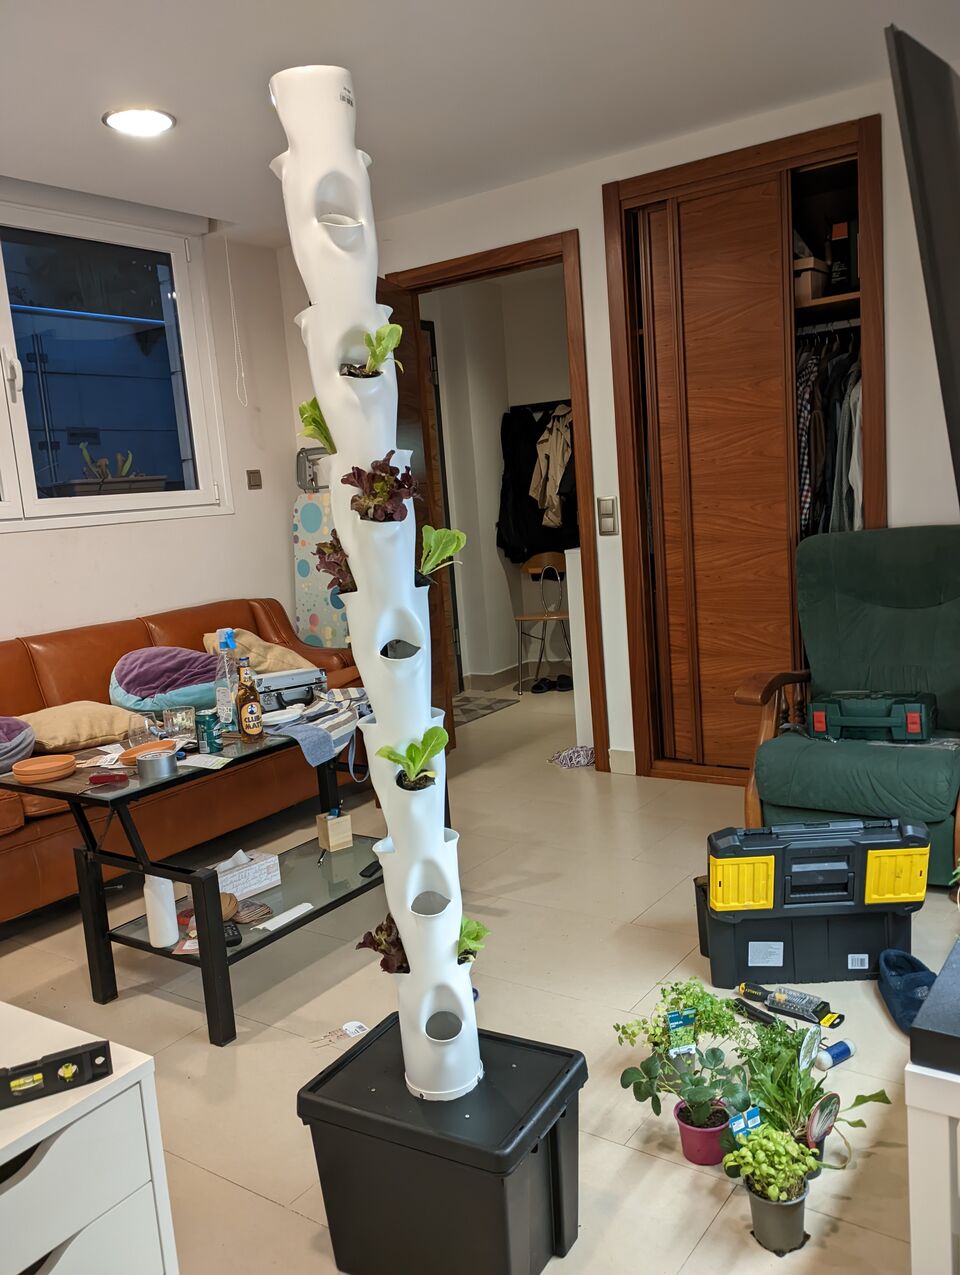
Finally, connect the pipe and the pump and cover the tower with the plant pot dish. You can put an additional net pot there and use it to fix the pipe end with a wire.
Choosing the plants
Since all plants will share the same water and nutrients, make sure to choose compatible ones. There is a nice reference table in igworks.com. Pay attention to overlapping pH and EC ranges. Long story short pH is the acidity of the water and EC is the amount of nutrients in the water.
Here is what I chose:
| Plant | pH | EC |
|---|---|---|
| Arugula | 5.5-6.8 | 0.8-1.4 |
| Basil | 5.5-6.5 | 1.0-1.6 |
| Lettuce | 5.5-6.5 | 0.8-1.2 |
| Parsley | 5.5-6.0 | 0.8-1.8 |
| Strawberries | 5.0-5.5 | 1.0-1.4 |
| Chard | 5.5-6.5 | 1.6-2.3 |
So in my case I’m targeting a pH of 5.5 and an EC of 1.2.
Fill the tank accordingly. This is easy if you have a pH and EC meter, otherwise do the math depending on your fertilizer. You can start with an NPK ratio of 1-1-1.
To add the plants, fill the net pots with expanded clay and put the seedlings in. Then, insert the pots in the PVC pipe pockets. You might need the water tape to stop the water from leaking in some pockets. Try to remove as much soil as possible from the roots, otherwise they’ll make the water dirty.
Maintenance
You will need to periodically check the water level, pH and EC. Also you might need to filter or replace the water after the first days if your seedlings had a lot of soil in their roots.
Lessons learned
Avoid soil as much as possible. Ideally, you will have your seedling directly in some rockwool or foam. But if you buy them from a nursery, they will come with soil. Try to remove as much as possible, since otherwise controlling the pH and EC will be a nightmare.
Another thing to keep in mind is that the water will evaporate and leak. This means that you will need to refill the tank every few days and adapt the pH and EC. If you can, keep a tank with water and nutrients ready to refill your tower.
Conclusion
This is a simple and cheap way to start with hydroponics. Let’s see in a month how the plants are doing.